

How to Propagate a Rubber Plant: Step-by-Step Guide for Beginners
Meta Title: How to Propagate a Rubber Plant Easily at Home
Meta Description: Learn step-by-step how to propagate a rubber plant using stem cuttings or air layering. A complete indoor gardening guide for beginners with tools, care tips, and FAQs.
Introduction
The rubber plant (Ficus elastica) is one of the most loved indoor plants for its large glossy leaves, air-purifying qualities, and minimal care needs. But did you know you can grow new rubber plants at home from a single plant? Yes, it’s easy and budget-friendly—all you need is the right method and a little patience.
In this guide, you’ll learn how to propagate a rubber plant using two main methods: stem cuttings and air layering. Whether you’re a gardening beginner or an indoor plant enthusiast, this step-by-step guide will help you grow new plants with success.
Why Propagate a Rubber Plant?
-
💰 Save Money: No need to buy new plants—just grow them yourself.
-
🪴 Expand Your Collection: Get more plants from one.
-
🎁 Perfect Gifts: A propagated rubber plant makes a thoughtful eco-friendly gift.
-
🌿 Plant Health: Pruning and propagating can rejuvenate a leggy or overgrown plant.


Best Time to Propagate
Rubber plants grow best in warm temperatures, so the ideal time to propagate is:
👉 Spring to early summer
This ensures faster root growth and healthier development. Avoid winter months, as plants go into dormancy.
Propagation Methods: An Overview
You can propagate a rubber plant in three ways:
-
Stem Cuttings in Water – Easy for beginners.
-
Stem Cuttings in Soil – Direct planting; less transplant shock.
-
Air Layering – Great for large, woody stems or tall plants.
Let’s explore each method in detail.
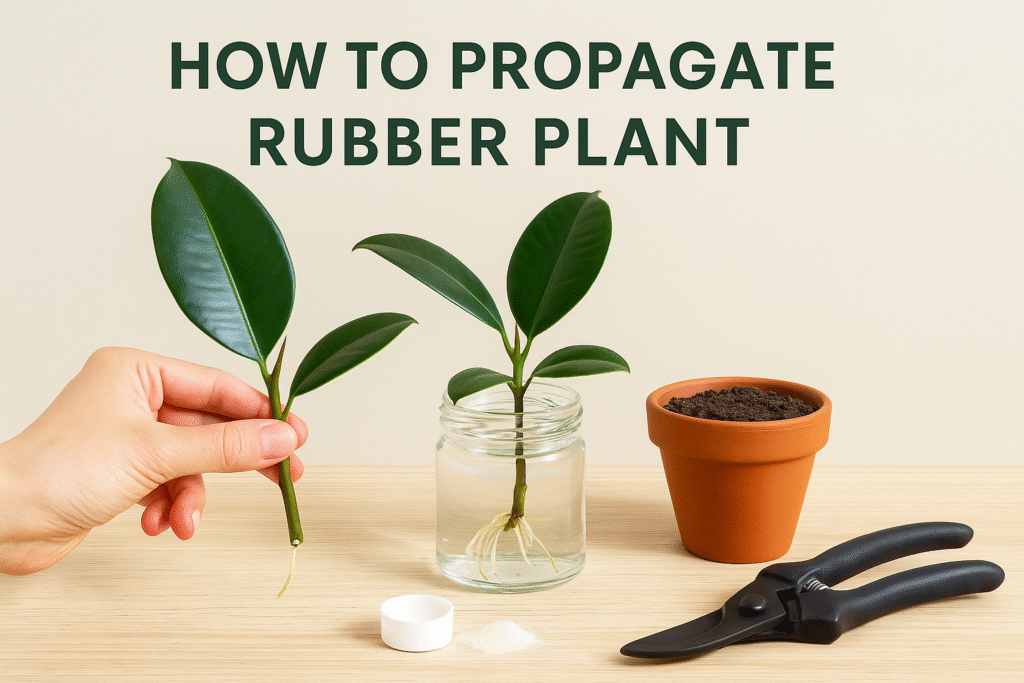
🌱 Method 1: Propagating Rubber Plant with Stem Cuttings (in Water)
✅ Best For:
-
Beginners
-
Small cuttings
-
Quick root visibility
🔧 Tools Needed:
-
Sharp knife or pruning shears (sterilized)
-
A healthy rubber plant
-
Clean glass jar
-
Filtered water
-
Optional: rooting hormone
🪴 Steps:
-
Choose the Right Stem
Select a healthy stem that’s 6–8 inches long with at least 1–2 leaves and a node (a small bump where leaves or roots grow). -
Make the Cut
Use sterilized shears to cut the stem just below a node. Remove the bottom leaf, leaving the top leaf(s) intact. -
Apply Rooting Hormone (Optional)
Dip the cut end in rooting hormone to speed up root growth. -
Place in Water
Submerge the cutting in a jar of water, ensuring the node is underwater but leaves are above. Place the jar in bright, indirect light. -
Change Water Regularly
Refresh the water every 3–4 days to prevent bacterial growth. -
Wait for Roots
In 2–4 weeks, roots will appear. Once roots are 1–2 inches long, transplant into potting soil.


🪴 Method 2: Propagating in Soil (Stem Cuttings)
✅ Best For:
-
Faster adaptation to soil
-
Direct potting
🔧 Additional Tools:
-
Small pot with drainage holes
-
Well-draining potting mix (peat + perlite or cocopeat)
-
Clear plastic bag (to create humidity dome)
🪴 Steps:
-
Take the Cutting
As in Method 1, choose a healthy stem with a node and remove lower leaves. -
Dip in Rooting Hormone
This is more helpful when propagating directly in soil. -
Plant in Pot
Insert the cutting 2–3 inches deep into moist potting soil. -
Create a Greenhouse Effect
Cover the pot with a clear plastic bag to maintain humidity. Don’t let the plastic touch the leaves. -
Place in Indirect Light
Avoid direct sunlight, which may overheat the cutting. -
Water Lightly
Keep the soil moist but not soggy. Check every few days. -
Root Development
Roots usually form in 4–6 weeks. Once you see new growth, remove the plastic bag.


🌳 Method 3: Air Layering
✅ Best For:
-
Large or mature rubber plants
-
Thicker stems
-
Higher success rate
🔧 Tools Needed:
-
Sharp knife
-
Sphagnum moss
-
Plastic wrap
-
Twist ties or string
-
Rooting hormone (optional)
🪴 Steps:
-
Select a Healthy Stem
Choose a mature stem 1–2 feet from the top. -
Make a Cut
Make a 1-inch diagonal cut halfway into the stem. Place a small stick or toothpick to keep it open. -
Add Rooting Hormone (Optional)
Apply to the exposed area to promote root growth. -
Wrap with Moss
Moisten the sphagnum moss and pack it around the cut. -
Cover with Plastic
Wrap plastic around the moss and secure both ends with twist ties. -
Wait for Roots
In 4–6 weeks, roots will appear inside the moss. -
Cut and Pot
Once roots are visible, cut below the moss and plant it in a pot with fresh soil.
READ ALSO: Snake Plant Care & Benefits – Easy Indoor Guide for Beginners
🧪 How Long Does Propagation Take?
| Method | Rooting Time |
|---|---|
| Water Cuttings | 2–4 weeks |
| Soil Cuttings | 4–6 weeks |
| Air Layering | 4–6+ weeks |

⚠️ Common Mistakes to Avoid
-
❌ Using dull or dirty tools (causes infections)
-
❌ Overwatering or underwatering
-
❌ Keeping in low light
-
❌ Not removing lower leaves (can rot in water or soil)
-
❌ Not being patient—rooting takes time!
💡 Rubber Plant Propagation Tips
-
Always sterilize tools before use.
-
Use rainwater or filtered water for cuttings.
-
Keep temperature around 21–27°C (70–80°F).
-
Be patient and check for signs of root rot or fungus.
🌿 Aftercare for Newly Propagated Rubber Plants
Once your rubber plant cutting is rooted and planted in soil:
-
Light: Place it in bright, indirect sunlight.
-
Watering: Water when top 1–2 inches of soil feels dry.
-
Fertilizing: Use a balanced indoor plant fertilizer once a month (after 1–2 months).
-
Repotting: Once it outgrows its pot, repot in a larger container.
❓ Frequently Asked Questions (FAQs)
1. Can I propagate a rubber plant from a leaf?
👉 No. A single leaf without a node won’t grow roots. You need a stem with at least one node.
2. How long does it take for a rubber plant cutting to root?
👉 Typically 2–6 weeks depending on method and conditions.
3. What type of soil is best for rubber plant propagation?
👉 Well-draining soil with peat, cocopeat, or perlite works best.
4. Is rooting hormone necessary?
👉 Not required, but it speeds up root development.
5. Should I cover the cutting in soil propagation?
👉 Yes, using a plastic dome or bag increases humidity and boosts success.
6. Can I propagate in winter?
👉 It’s not recommended. Plants are dormant and root growth is slow.
7. What happens if the cutting rots?
👉 Start fresh with a new cutting. Always use sterile tools and change water regularly.
8. How do I know my cutting has rooted?
👉 You’ll see new leaf growth or resistance when you gently tug the cutting.
9. Can I use compost for propagation?
👉 Compost is too rich and moist—better to use a light, airy potting mix.
10. How often should I change water for water propagation?
👉 Every 3–4 days to prevent bacterial buildup.
🏁 Conclusion
Propagating a rubber plant is not only a fun DIY gardening project but also a smart way to grow your indoor plant collection for free. Whether you choose water propagation, soil propagation, or air layering, the key to success is patience, proper care, and the right environment.
By following the steps above, you’ll soon have new rubber plants thriving in your home—ready to decorate your space or gift to friends!