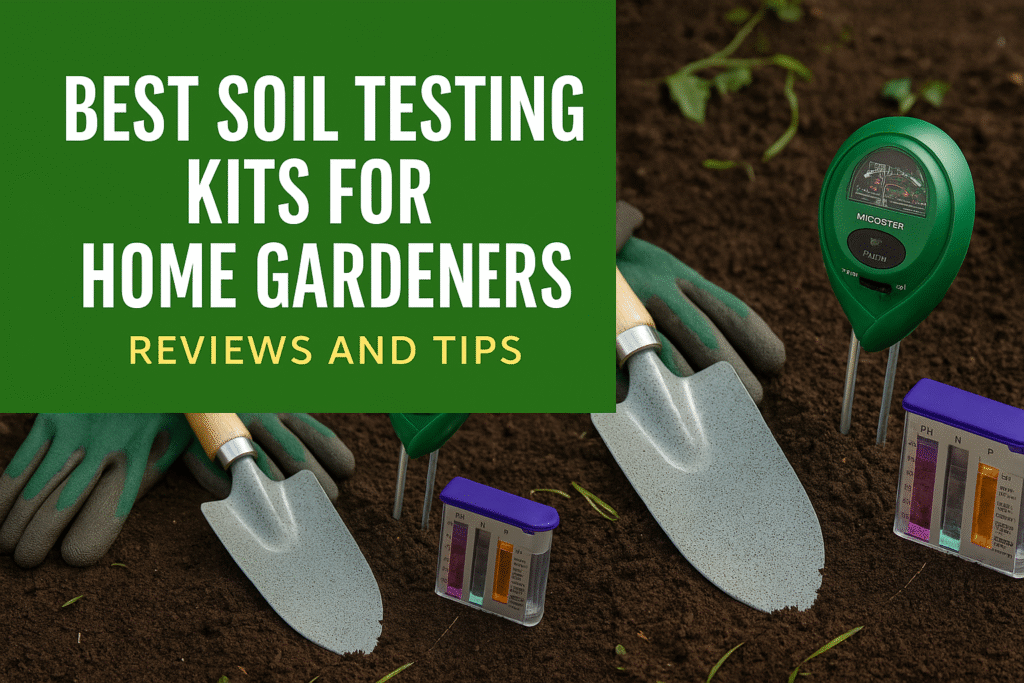
Best Soil Testing Kits for Home Gardeners: Reviews and Tips
Understanding your soil is key to successful gardening. Whether you’re growing vegetables, flowers, or houseplants, a soil testing kit can help you determine pH levels, nutrient content, and overall soil health. In this guide, we review the best soil testing kits for home gardeners and provide tips to help you choose the right one.
Introduction
Knowing your soil’s condition is the foundation of a healthy, productive garden. Whether you’re growing vegetables, flowers, or houseplants, the nutrients and pH level in your soil directly impact your plant’s growth and vitality. That’s where soil testing kits come in. These easy-to-use tools help you assess important factors like acidity, nitrogen, phosphorus, and potassium content. With the right test kit, you can make informed decisions about fertilization, composting, and watering—saving time, money, and frustration. In this article, we review the top soil testing kits for home gardeners, compare their features, and offer helpful tips for getting accurate results.
Why Test Your Soil?
Soil testing allows you to:
- Determine soil pH (acidity/alkalinity)
- Identify nutrient deficiencies (NPK – Nitrogen, Phosphorus, Potassium)
- Adjust fertilization and composting plans
- Prevent over-fertilization and root burn
- Improve crop yield and plant health
Types of Soil Testing Kits
1. Chemical Test Kits
These kits use color-coded capsules and compare your results against a chart. Great for pH, nitrogen, phosphorus, and potassium.
- Pros: Affordable, easy to use
- Cons: Less accurate than lab testing
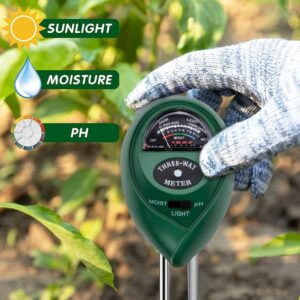
2. Digital Soil Testers
Digital probes measure pH, moisture, temperature, and sometimes nutrient levels.
- Pros: Quick readings, reusable
- Cons: Can be more expensive; batteries required
3. Lab Testing Services
Collect a soil sample and send it to a professional lab for detailed analysis.
- Pros: Extremely accurate and detailed
- Cons: Expensive and takes time
Top 5 Soil Testing Kits for Home Gardeners
1. Luster Leaf Rapitest Soil Test Kit (Model 1601)
- Type: Chemical
- Tests For: pH, N, P, K
- Pros: Affordable, widely available, easy to use
- Cons: Requires color comparison, not reusable
- Best For: Budget-conscious gardeners
2. Sonkir Soil pH Meter (3-in-1)
- Type: Digital
- Tests For: pH, moisture, sunlight
- Pros: No batteries needed, lightweight
- Cons: Limited to basic readings
- Best For: Quick spot checks
3. MySoil Soil Test Kit
- Type: Lab-based
- Tests For: pH, nutrients (NPK), organic matter
- Pros: Highly accurate, includes fertilizer recommendations
- Cons: Requires mailing in a sample
- Best For: Serious gardeners
4. Garden Tutor Soil pH Test Strips Kit
- Type: pH test strips
- Tests For: pH only
- Pros: Simple, no tools or batteries
- Cons: No nutrient data
- Best For: pH-focused users
5. Environmental Concepts 1662 Professional Soil Test Kit
- Type: Chemical
- Tests For: pH, N, P, K (40 tests total)
- Pros: Multiple tests, good value
- Cons: May feel complex to beginners
- Best For: Gardeners with large or varied landscapes
READ ALSO: Foodscaping Made Easy: How to Turn Your Front Yard into a Beautiful, Edible Garden
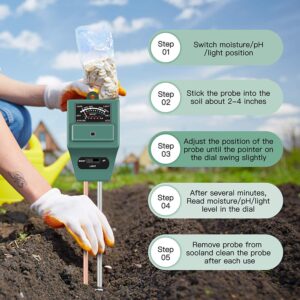
How to Use a Soil Test Kit (General Steps)
- Take soil samples from different spots in your garden.
- Mix the samples in a clean container.
- Follow the instructions of your chosen kit.
- Compare results or submit to lab.
- Adjust soil using compost, lime, or fertilizer based on results.
Tips for Accurate Results
- Don’t test immediately after fertilizing.
- Take samples at root level (4–6 inches deep).
- Use clean tools and containers.
- Repeat tests seasonally or yearly for best results.
What to Do Before Testing
Before you start testing your soil, follow these steps to ensure accurate results:
- Wait at least 2 weeks after fertilizing. Recent applications can skew results.
- Choose a dry day. Avoid collecting soil when it’s overly wet or muddy.
- Use clean tools. Contaminants from dirty spades or containers can affect readings.
- Avoid unusual areas. Don’t sample near compost piles, roadsides, or heavily trafficked garden edges.
- Mark multiple sampling spots. For a representative sample, collect soil from 4–6 areas in your garden.
- Dig 4–6 inches deep. This is where plant roots grow, and nutrients matter most.
Now you’re ready to move on to using your chosen soil test kit.
What to Do After Testing
Based on your results:
- Add lime to raise pH (make soil less acidic)
- Use sulfur to lower pH (make soil more acidic)
- Add organic compost to improve texture and nutrients
- Choose fertilizers based on lacking nutrients
Frequently Asked Questions (FAQs)
Q1. How often should I test my soil?
A: It’s best to test your soil once a year, ideally in early spring or fall before planting.
Q2. Can soil test kits be reused?
A: Digital meters are reusable, while most chemical test kits and strips are single-use.
Q3. Are home soil test kits accurate?
A: They provide reasonably accurate results for basic pH and nutrient levels. For detailed analysis, lab testing is more reliable.
Q4. What’s the ideal soil pH for most plants?
A: Most plants thrive in slightly acidic to neutral soil (pH 6.0–7.0).
Q5. Can I test potting soil with these kits?
A: Yes, but results may vary due to added fertilizers or moisture-retaining materials in potting mixes.
Q6. What should I do if my soil is too acidic or alkaline?
A: Use lime to raise pH (reduce acidity) or sulfur to lower pH (increase acidity), based on test results.
Conclusion
Choosing the right soil testing kit depends on your gardening goal, budget, and desired accuracy. From quick DIY kits to lab-based solutions, there’s something for every type of home gardener. Regular soil testing leads to smarter fertilizing, healthier plants, and a more vibrant garden. Make soil testing part of your gardening routine and watch your plants thrive!